What is CI/CD?
CI/CD stands for Continuous Integration/Continuous Deployment, which is a set of practices used in software development to automate the building, testing, and deployment of code changes.
Continuous Integration is the practice of frequently merging code changes into a shared repository, which is then automatically built and tested to detect any integration issues early in the development process. This helps to ensure that the software remains stable and that bugs are caught early on.
Continuous Deployment takes this a step further by automating the deployment of the code changes to production environments, allowing for faster and more frequent releases. This can help to reduce the time to market for new features and bug fixes.
Continuous Delivery accomplishes this by automating the entire delivery process, from building the code to running automated tests and deploying to production. This means that every code change is automatically tested, packaged, and ready to be deployed to production. However, in continuous delivery, the deployment process is still initiated manually. This allows teams to perform additional checks and balances before releasing the code to production, such as running user acceptance tests, security audits, or performing a final manual code review.
What Is a Build Job?
A build job is a specific task or set of tasks that are executed to build and package an application or software component. The build job is typically defined in a CI/CD pipeline and is triggered automatically by changes to the code repository.
A build job can include various steps, such as compiling the code, running unit tests, generating documentation, and packaging the application into a deployable artifact. The build job is often the first step in the CI/CD pipeline and is critical to ensuring that code changes are stable and ready for deployment.
What are Freestyle Projects?
- Freestyle Projects in Jenkins allow users to configure build steps in any order they prefer, and to use any combination of build steps that they find useful. This can include shell scripts, Windows batch commands, or any other type of command-line executable. Freestyle Projects also allow users to define various triggers to automatically initiate a build, such as when changes are pushed to the source code repository, or at specified intervals.
React Django App
Task 1
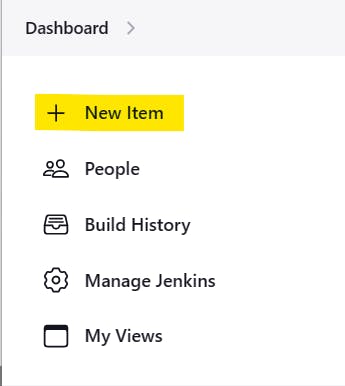
Log in to the Jenkins dashboard and create New Item.

Now give a name and select Freestyle Project and click on OK.

In the project configuration, put the details of the project, such as the source code management system, build triggers, and build actions. In the GitHub project put your GitHub project repository URL.

In the Source Code Management section, add the GitHub repository link.

And specify the branch name from GitHub

In the Build Step tab, select "Execute Shell" and pass the docker build command
Next, pass the docker run command to start a container using the image specified.
 docker build . -t react-django-app
 docker run -d -p 8001:8001 react-django-app:latest
Now we must ensure that docker is installed in the system and docker usermod is given to "jenkins"
 sudo apt-get install docker.io -y
 sudo apt-get install docker-compose
 sudo usermod -aG docker $USER
 sudo dockermod -aG docker jenkins
 sudo reboot
Now you can start the build process of the project by manually clicking on the “build now” tab.

Once the build is successful, you can go to the console output and check the output of the build.


We can verify the project file and docker container running on the server.


Add the inbound rule and give the port 8001 to get started and view the page using public IP.


We can browse the application

TASK 2:
Create a Jenkins project to run "docker-compose up -d" command to start the multiple containers defined in the compose file.
Set up a cleanup step in the Jenkins project to run "docker-compose down" command to stop and remove the containers defined in the compose file.

Save the configuration and build the project.

Now access the application in the browser using the public IPv4 address:port_number.

Node Todo App
Create a new job and set a name for it.

Now we have to copy the existing item React Django App and apply to this project.

Now add appropriate description for the item & pass the GitHub Repo URL.

Now in the Source Code Management pass the Repository URL.

Then select the branch appeared on GitHub

Now in the Build Step pass the docker-compose command to build the application.

Then click on Built Now to start the building application.

We can verify the File from the Linux server.


Add & edit the inbound rule and port 8000 which will be accessible to Anywhere IPv4 address.

Now we can access the application on the browser.

Thank You,
I want to express my deepest gratitude to each and every one of you who has taken the time to read, engage, and support my journey.
Feel free to reach out to me if any corrections or add-ons are required on blogs. Your feedback is always welcome & appreciated.
~ Abhisek Moharana 😊
