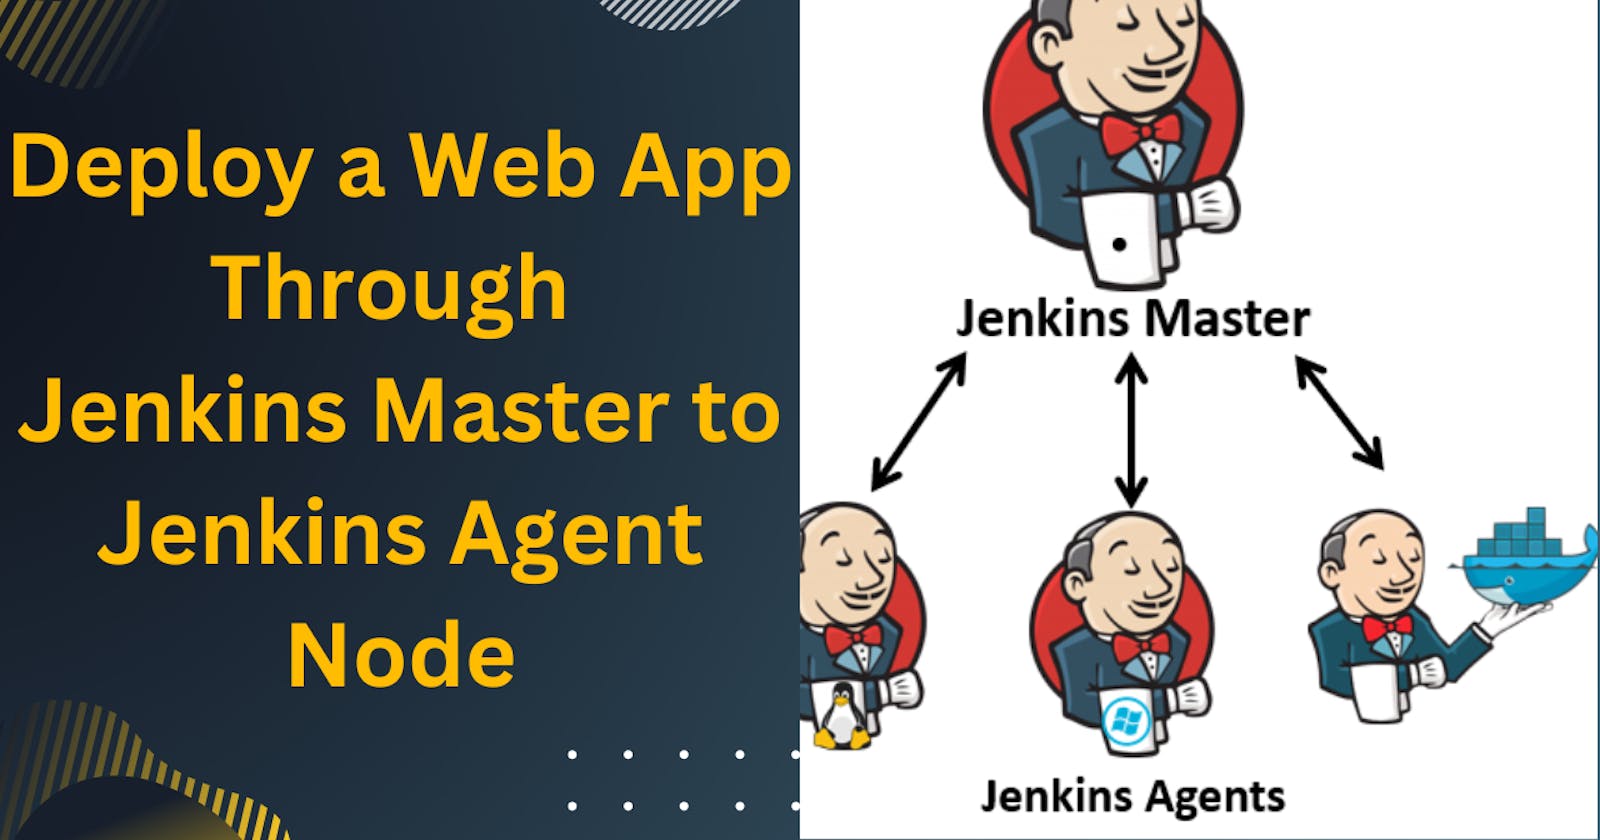
Jenkins Master (Server)
- Jenkins Master (Server) is the primary node that manages and distributes the software development processes across various worker nodes. It is responsible for coordinating the build process, managing plugins, and scheduling jobs. The Jenkins Master node serves as the central point of control for all tasks and workflows, and it provides a web interface for managing and monitoring the build process.
Jenkins Agent
Jenkins Agent, also known as Jenkins Node is a worker node that executes the tasks and builds assigned by the Jenkins Master. It works as a distributed system where the Jenkins Master assigns tasks to Jenkins Agents, which then execute the tasks on the machines they are running on.
Jenkins Agents are often used to distribute builds and tests across multiple machines, allowing for parallel execution of tasks and faster build times. Jenkins Agents can be configured to run on a variety of machines, including physical machines, virtual machines, and containers to include any necessary tools and dependencies required for the tasks assigned by the Jenkins Master.

Project: Deploy a web app through Jenkins master to Jenkins worker node
Set Up Jenkins-Master & Jenkins-Agent
Create a 2 EC2 instance in AWS and connect both servers.
jenkins-master
jenkins-agent

Now clear up the unwanted images from the jenkins-server
docker rmi <image-name> --forceGenerate SSH key on the jenkins-master using "ssh-keygen" command.
 ssh-keygen

 # Sometime your Master and Agent node failed in Jenkins, so try with ed25519 keygen format.
 # ssh-keygen -t ed25519
 # ed25519 is a keygen format
Now go to that folder and copy the id_rsa.pub which is public key.
 cd .ssh
 ls
 cat id_rsa.pub
Then on the jenkins-agent server, paste the public key from the jenkins-master in the authorized_keys file.
 cd .ssh
 ls
 vi authorized_keys
Now from the jenkins-master we can connect the jenkins-agent server
 # inside ssh dir
 ssh ubuntu@<Public-IPv4-addr>

 # if we exit we will be back to jenkins-server.
Make sure to install Java in the agent server.
 sudo apt-get update
 sudo apt-get install openjdk-11-jre
Now go to the Jenkins Dashboard and click on Manage Jenkins.
Now click on Manage Nodes & Clouds, and click on "+ New Node"


Add details of the second agent node(make sure to fill in the Labels)
Node name: agent-node
✅ Permanent node

Name: agent
Desc: This is our agent which will run Node JS application

Number of executaion: 1 (cpu)
Remote root directory: /home/ubuntu/jenkins-agent
Labels: dev-server
Usage: Only build jobs with label expression matching this node
Launch method: launch agents via SSH
Host: <Public-IPv4-addr-agent>

Credentials:
Kind: SSH username with private key
ID: jenkins-ssh-key
Description: jenkins-ssh-key
Username: ubuntu
Private Key: <Private-key-master-node>
Host Key Verification Strategies: Non verifying verification strategy (SSH check with keys)


Now click "OK" and Node will be connected and online.

Installed docker-compose for future requirements.
sudo apt-get install docker.io docker-compose
sudo usermod -aG docker $USER
sudo restart
Set Up Node Application
Now create a new item with the pipeline, and named it(node-pipeline)

Now give it a description "This is a declarative pipeline for Node JS App
Put the GitHub repo

Build Triggers ✅ GitHub hook triggers for GITScm polling.

Now we have to pass the pipeline script in the pipeline to test the script.
 pipeline {
     agent { label "dev-server" }
     stages{
         stage("Clone Code"){
             steps{
                 git url: "https://github.com/Abhisek773/node-todo-cicd.git", branch: "master"
             }
         }
         stage("Build and Test"){
             steps{
                 sh "docker build . -t node-app-test-new"
             }
         }
         stage("Push to Docker Hub"){
             steps{
                 echo "Docker Hub will receive the image"
             }
         }
         stage("Deploy"){
             steps{
                 sh "docker-compose down && docker-compose up -d"
             }
         }
     }
 }
Now go to Manage Jenkins > Manage Plugin and install the "Environment Injector" and Download and install after restart Jenkins. It will store all the environment variables where we can pass the credentials.


Now go to Manage Jenkins > Credentials > System > Global Credentials > globals > + Add Credentials

 Kind: username with password
 username: <DockerHub_Username>
 password: <DockerHub_Password>
 ID: dockerHub
 Desc: This is my Docker Hub Credentials
Now configure the pipeline for pushing the image into the docker hub.
 pipeline {
     agent { label "dev-server" }
     stages{
         stage("Clone Code"){
             steps{
                 git url: "https://github.com/LondheShubham153/node-todo-cicd.git", branch: "master"
             }
         }
         stage("Build and Test"){
             steps{
                 sh "docker build . -t node-app-test-new"
             }
         }
         stage("Push to Docker Hub"){
             steps{
                 withCredentials([usernamePassword(credentialsId:"dockerHub",passwordVariable:"dockerHubPass",usernameVariable:"dockerHubUser")]){
                 sh "docker tag node-app-test-new ${env.dockerHubUser}/node-app-test-new:latest"
                 sh "docker login -u ${env.dockerHubUser} -p ${env.dockerHubPass}"
                 sh "docker push ${env.dockerHubUser}/node-app-test-new:latest"
                 }
             }
         }
         stage("Deploy"){
             steps{
                 sh "docker-compose down && docker-compose up -d"
             }
         }
     }
 }
Click on Save, and your project will be tied to Jenkins-agent.

Now, build your project.


Open 8000 port on jenkins-agent, now the app can be accessed from the browser.


Our application image is also pushed to DockerHub.

Set Up the Node app using Pipeline Script from SCM
We can build the application using the Pipeline script from SCM by passing the GitHub URL where "Jenkinsfile" is present in the repository.
Now in the pipeline script, use "Pipeline script from SCM"
SCM: Git
Repository: <URL-of-Git-Repo>
Script Path: Jenkinsfile


Now the application is up & running and there is a new step added by Jenkins, Declarative Checkout SCM to verify that Jenfinsfile is available in the GitHub repo. Once the file is verified, then further steps proceed.

Congratulation!! The whole CI CD pipeline for this Node JS application is done including pushed images into the GitHub.
Thank You,
I want to express my deepest gratitude to each and every one of you who has taken the time to read, engage, and support my journey.
Feel free to reach out to me if any corrections or add-ons are required on blogs. Your feedback is always welcome & appreciated.
~ Abhisek Moharana 😊
